Reverse Engineering: How We Replicate Parts Without Original Drawings
By Adil, Managing Director at AMN Engineering · · 6 min read
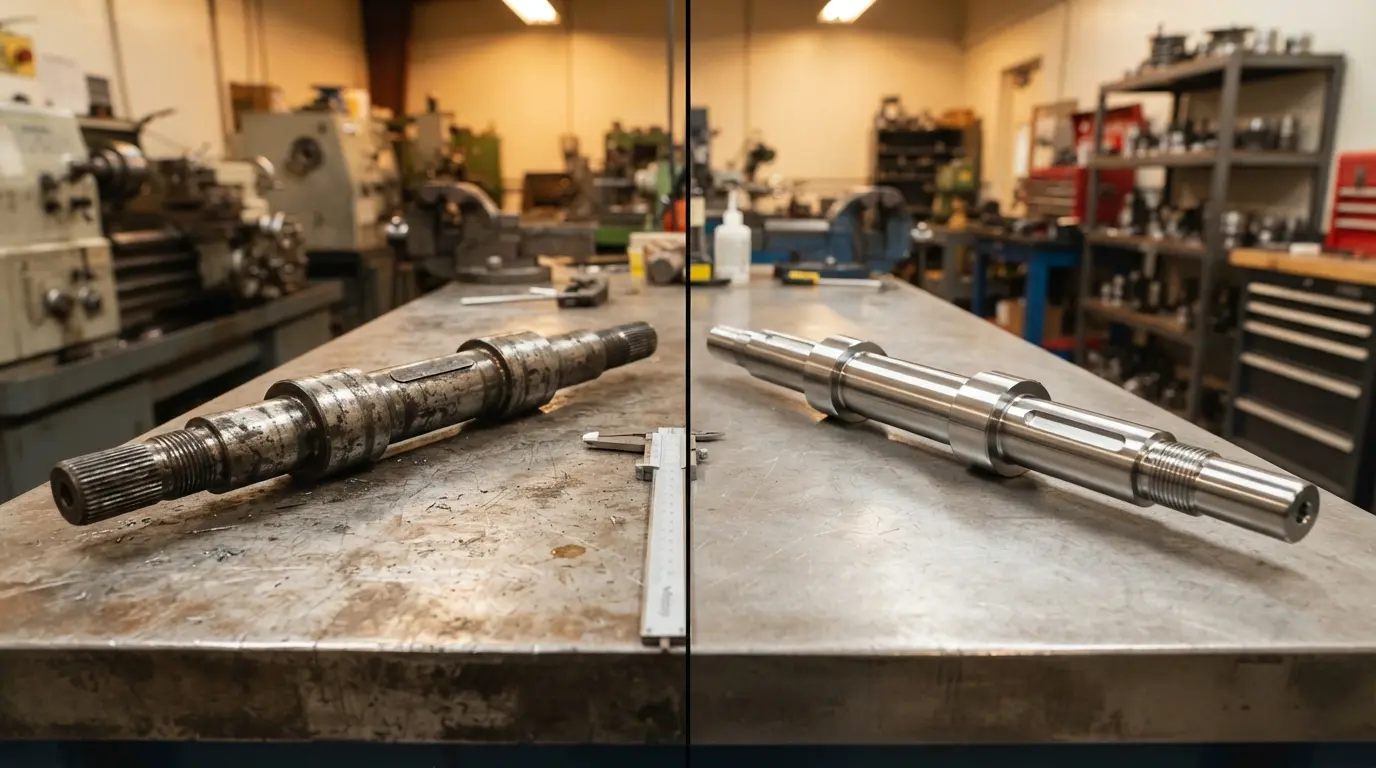
You have a broken part. No drawing. No CAD file. The original manufacturer is out of business or refuses to supply replacements. Your machine is sitting idle until you get a replacement.
This is where reverse engineering comes in. We take your physical sample, measure every dimension, create a new drawing, and CNC machine an exact replica. No original drawing needed. No OEM involvement.
We do this regularly at AMN Engineering for clients who have obsolete equipment, discontinued parts, or suppliers who have stopped responding. This guide explains how the process works, how accurate it is, and what to send us to get started.
What Is Reverse Engineering?
Reverse engineering in manufacturing means taking a physical part (the sample) and working backward to create a drawing and then a new part. Instead of starting from a design, you start from the finished product.
The process: Physical part → Measurement → Drawing/CAD model → Manufacturing → New part
The result is a part that matches the original in dimensions, material, and function.
When You Need It
OEM no longer exists or has stopped supplying. The original manufacturer has closed, or they no longer produce the part because the equipment model is discontinued.
No drawings available. The part was made decades ago. The original drawings are lost, were never shared, or were proprietary to a supplier who will not release them.
Urgent replacement needed. Your machine is down. Waiting 12 weeks for an OEM part is not an option. Reverse engineering and local manufacturing can deliver in 2 to 3 weeks.
Cost reduction. The OEM charges a premium for replacement parts. A contract manufacturer can often produce the same part at 30 to 50 percent lower cost once the drawing is created.
Improvement opportunity. While replicating the part, you can upgrade the material (e.g., from EN8 to EN24 for longer life) or modify the design to fix a known weak point.
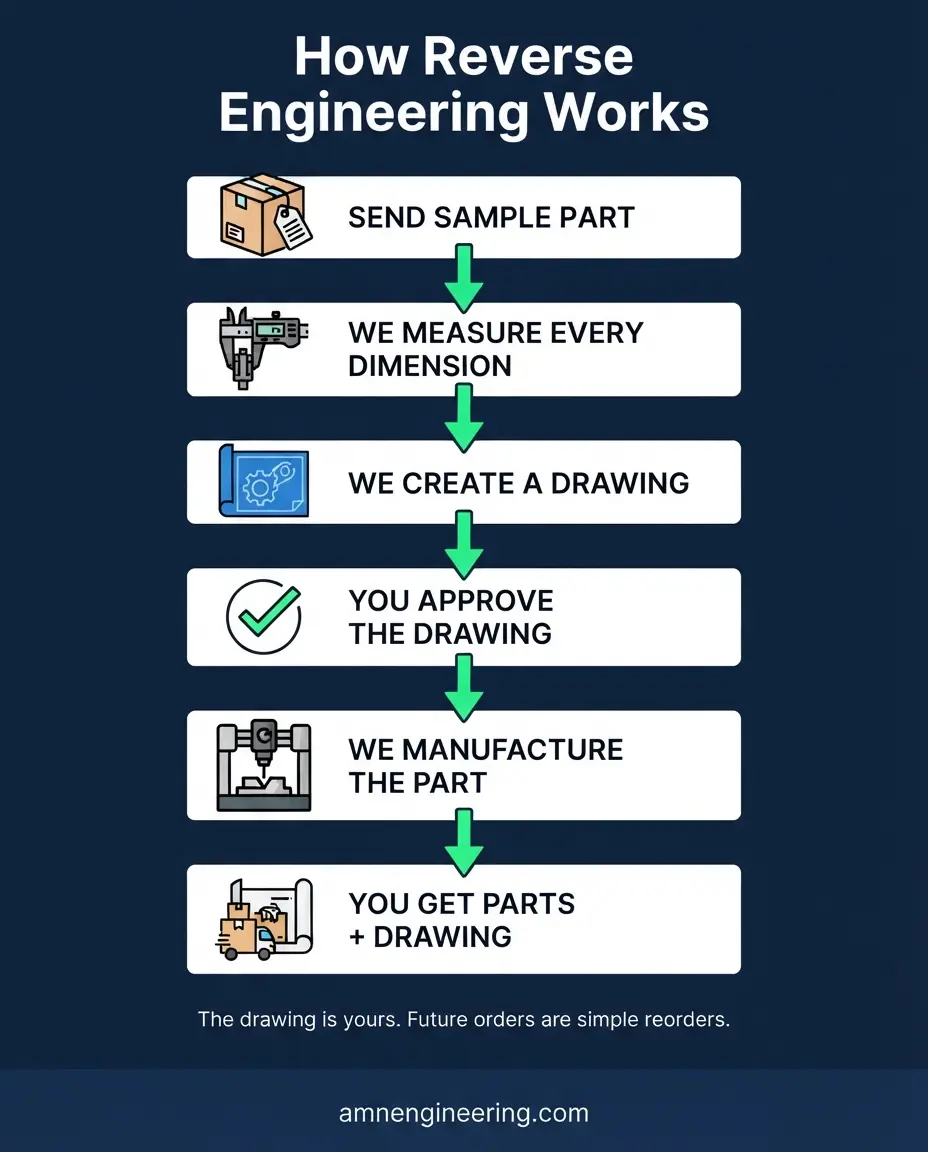
The Process: Step by Step
Step 1: You Send the Sample
Ship us the original part (or multiple samples if available). If you cannot ship it, send detailed photographs from every angle with key measurements marked. Include any information you have: material, application, operating conditions, and what went wrong.
Step 2: We Measure Everything
Using calipers, micrometers, bore gauges, height gauges, and coordinate measuring machines (CMM), we measure every critical dimension of the sample:
- External and internal diameters
- Lengths, depths, and widths
- Thread type, size, and pitch (BSP, metric, UNC)
- Hole positions, patterns, and sizes
- Radii, chamfers, and fillets
- Surface finish on functional surfaces
- Keyway dimensions, spline profiles, gear tooth data
Step 3: We Create a Drawing
From the measurements, we create a full 2D engineering drawing with dimensions, tolerances, and material specification. For complex parts, we also create a 3D CAD model (STEP format). This drawing becomes your property. You own it and can use it for future orders with any manufacturer.
Step 4: You Approve the Drawing
We send the drawing to you for review. You confirm that the dimensions look correct and approve the material and any modifications. If the original part is worn, we discuss whether to replicate the worn dimensions or restore to the original design intent.
Step 5: We Manufacture the Part
Once approved, we CNC machine, fabricate, or produce the part using the appropriate process. The new part is inspected against the drawing with a full dimensional inspection report.
Step 6: You Receive the Part and the Drawing
You get the finished parts plus the engineering drawing. The drawing means you never need to reverse engineer this part again. Future orders are simple reorders from the existing drawing.
Accuracy: How Close Can We Get?
With proper measurement equipment, reverse engineered parts are typically accurate to:
| Feature | Achievable Accuracy |
|---|---|
| Diameters | Plus or minus 0.02mm |
| Lengths | Plus or minus 0.05mm |
| Hole positions | Plus or minus 0.05mm |
| Thread identification | Exact match (verified with gauges) |
| Profile/contour | Plus or minus 0.05mm |
For most replacement applications, this level of accuracy produces a part that is functionally identical to the original. In many cases, the reverse engineered part is actually more accurate than the original because modern CNC machines hold tighter tolerances than the older machines that made the original.
What If the Original Part Is Worn?
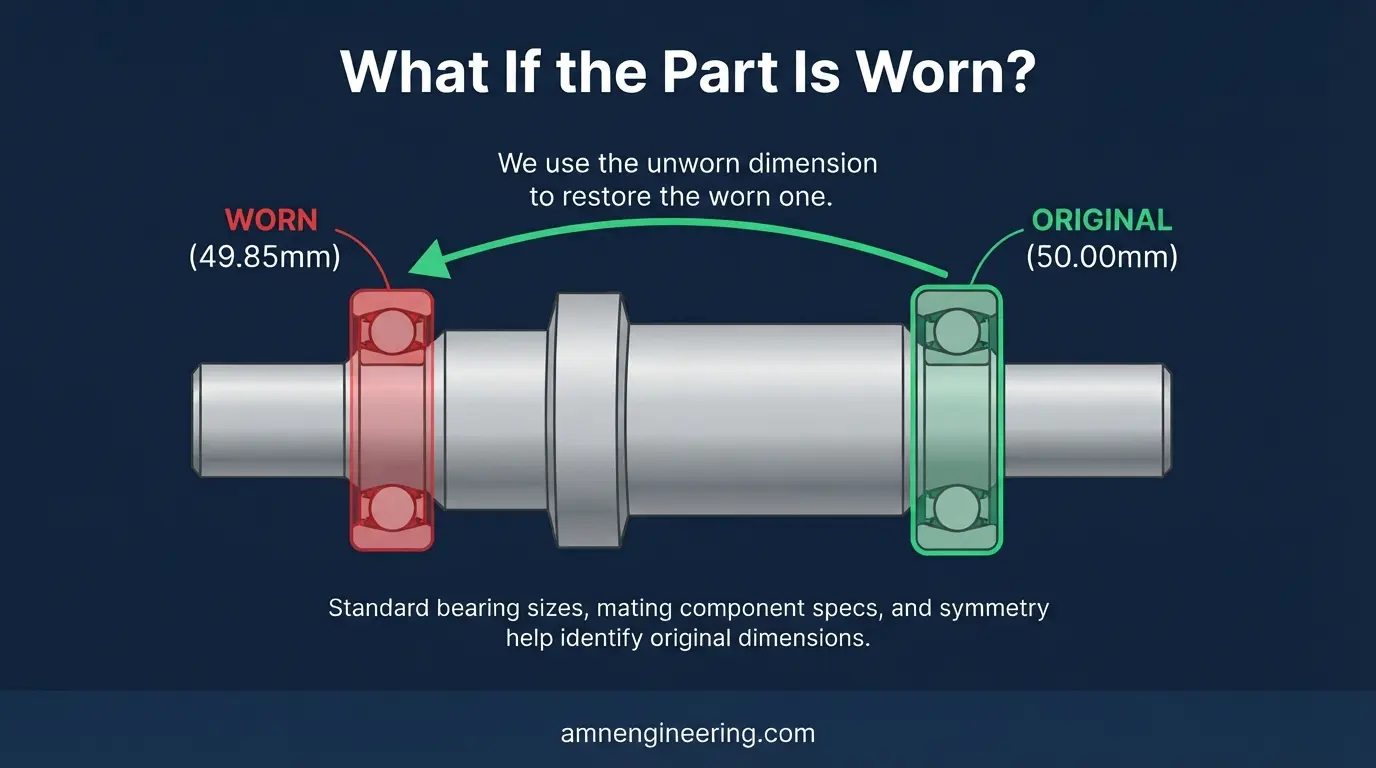
Worn parts require judgment. A shaft bearing seat that has worn from 50.00mm to 49.85mm should be manufactured at 50.00mm (the original design dimension), not 49.85mm.
How We Handle Worn Parts
Symmetrical features: If a shaft has two bearing seats and one is worn while the other is not, the unworn seat gives us the original dimension.
Standard sizes: Many features (bearing bores, thread sizes, keyway widths) are standard sizes. We can identify the original standard even from a worn part.
Application knowledge: If we know the part mates with a specific bearing, seal, or housing, we can determine the correct dimension from the mating component specification.
Your input: You know your equipment. If you can tell us which surfaces are worn and which are original, we can adjust accordingly.
If multiple samples are available (one worn, one less worn), comparing them helps identify wear patterns and original dimensions.
Cost and Lead Time
Cost
Reverse engineering adds a one time cost for measurement and drawing creation. This typically adds $100 to $500 to the first order depending on part complexity. After the first order, the drawing exists and future orders have no additional reverse engineering cost.
The parts themselves are priced the same as any CNC machined or fabricated part based on material, complexity, and quantity.
Lead Time
| Phase | Time |
|---|---|
| Measurement and drawing | 2 to 5 working days |
| Your approval | 1 to 2 days |
| Manufacturing | 1 to 3 weeks (depending on process and quantity) |
| Total | 2 to 4 weeks |
For urgent breakdowns, we can expedite the entire process to under 2 weeks.
Frequently Asked Questions
Taking a physical part without drawings, measuring all dimensions, creating a new drawing, and manufacturing an exact replica. The result is a new part plus a drawing for future orders.
Yes. Send us the physical part and we will measure, draw, and manufacture it. If you cannot ship the part, detailed photos with key measurements can work for simpler parts.
Typically plus or minus 0.02 to 0.05mm on critical features. Modern CNC machines often produce parts more accurate than the originals.
We identify worn areas and restore dimensions to the original design intent using symmetry, standard sizes, and mating component information.
2 to 4 weeks total from receiving the sample to delivering finished parts. Can be expedited for urgent breakdowns.