Why Prototype Testing Matters Before Full Production
By Adil, Managing Director at AMN Engineering · · 8 min read
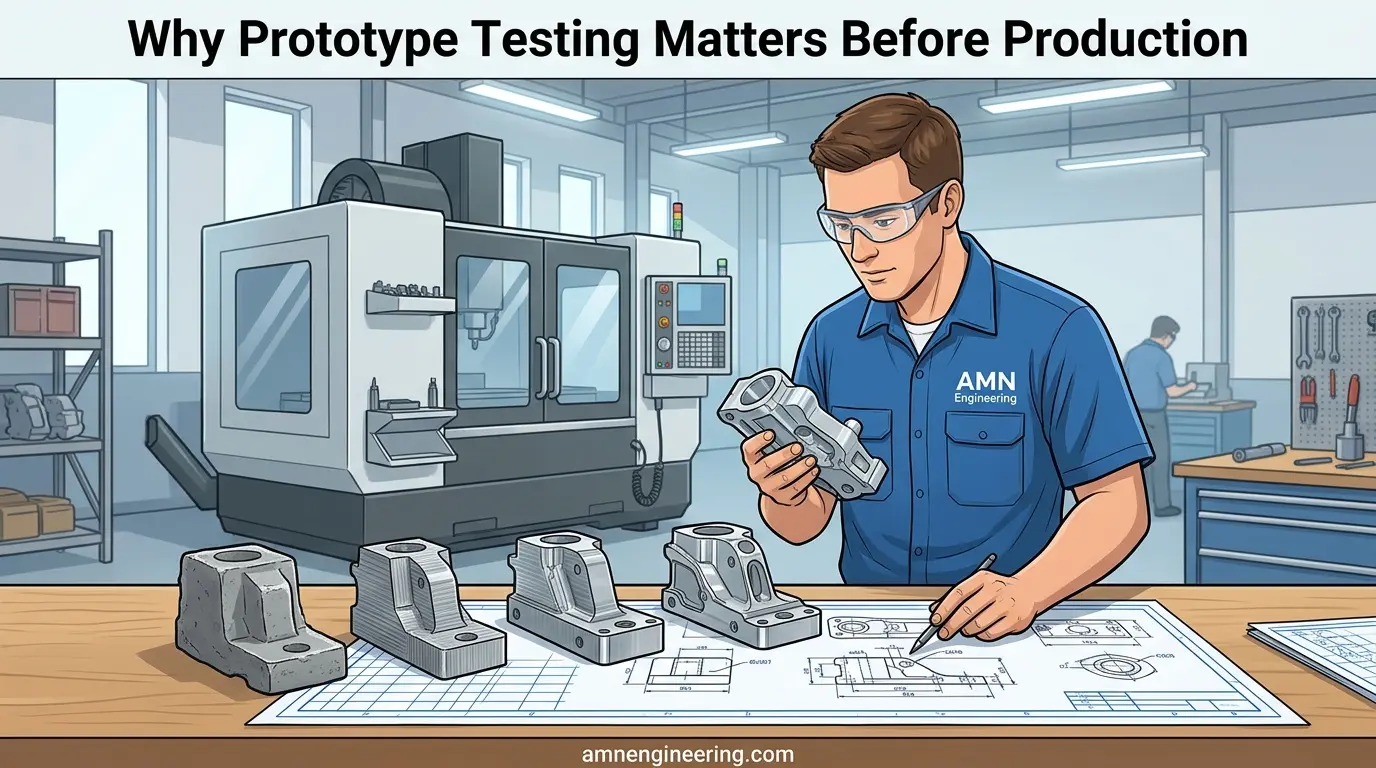
Prototype testing before production is one of the smartest investments any buyer can make. A single prototype costing a few hundred dollars can prevent a production mistake that costs tens of thousands. Yet many procurement teams skip this step to save time, and they end up paying far more when problems appear at scale.
At AMN Engineering, we have been manufacturing custom parts since 1999. In over 25 years, the most expensive projects we have seen are the ones where the buyer went straight to production without testing a single prototype first.
This guide explains why prototype testing matters, what types of prototypes exist, and how to build a testing process that protects your budget and your timeline.
Why Skipping Prototypes Is the Most Expensive Mistake
When a buyer sends a drawing and orders 1,000 pieces without first making a prototype, they are gambling. If the design has a fit issue, a tolerance problem, or a material mismatch, all 1,000 parts may need rework or replacement.
Here is what that looks like in real numbers:
| Scenario | Cost |
|---|---|
| 1 prototype to test fit and function | $150 to $500 |
| Discovering a wall thickness issue after 1,000 parts are made | $8,000 to $25,000 in scrap and rework |
| Retooling a die casting mold after production has started | $5,000 to $15,000 |
| Delaying a product launch by 4 to 6 weeks | Lost revenue and damaged client trust |
The math is simple. Spending $300 on a prototype to avoid a $15,000 mistake is not an expense. It is insurance.
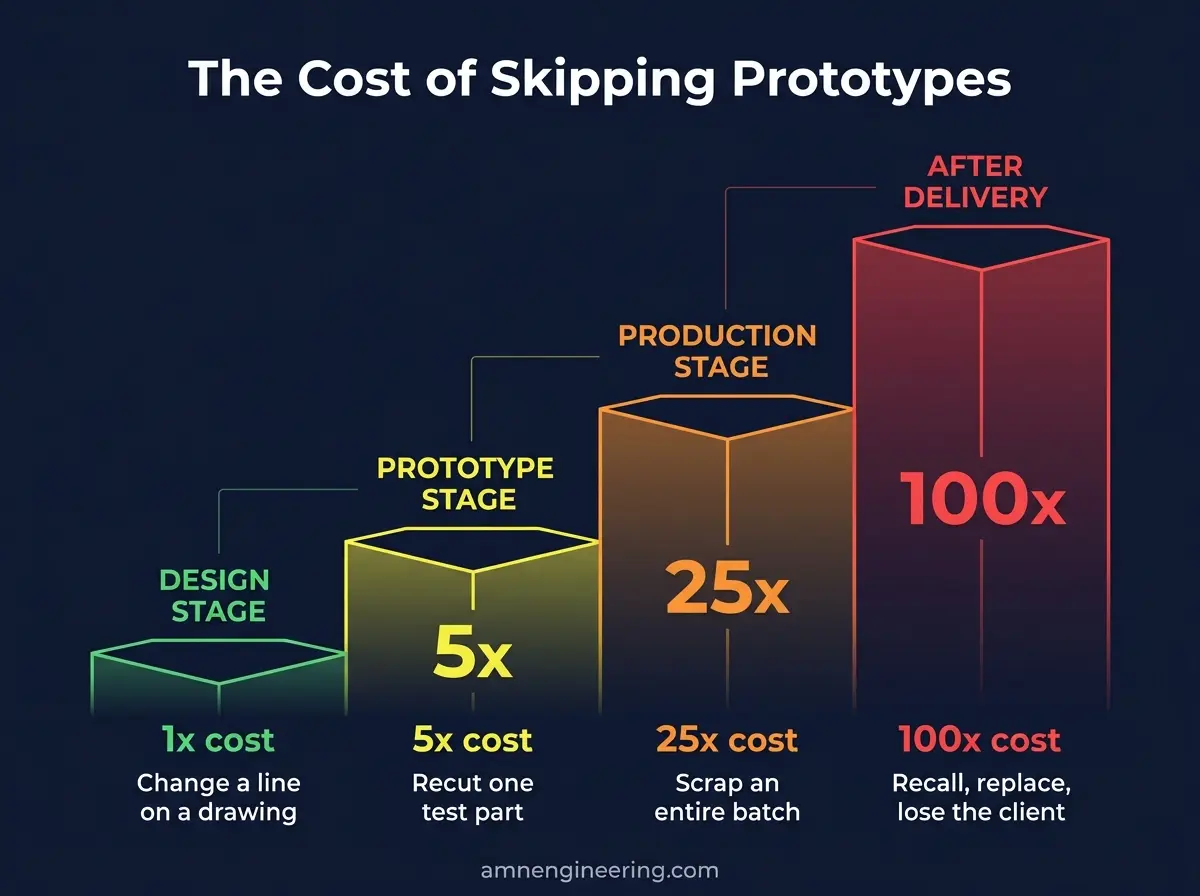
The cost of fixing a defect increases by roughly 10x at each stage of the production process. A problem that costs $50 to fix at the design stage costs $500 at the prototype stage, $5,000 during production, and $50,000 after delivery.
Three Types of Prototypes Every Buyer Should Know
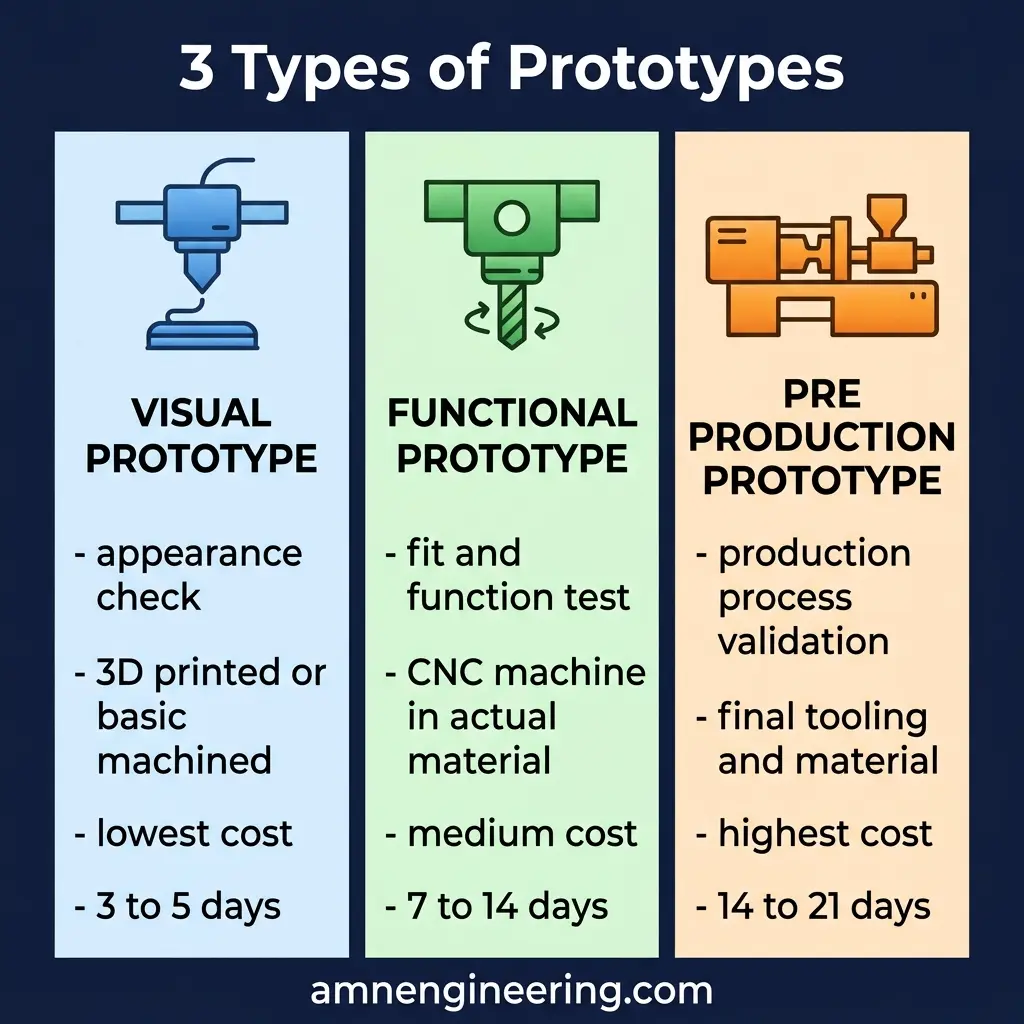
Not all prototypes serve the same purpose. Understanding the differences helps you choose the right one for your project.
1. Visual Prototype
A visual prototype shows the size, shape, and appearance of the part. It is useful for checking dimensions, verifying how the part looks in an assembly, and getting approval from stakeholders who need to see the physical product.
Visual prototypes may be made from a different material than the final part. For example, a steel component might first be prototyped in aluminum to check the geometry before committing to the more expensive material.
Best for: design reviews, client presentations, checking fit in an assembly.
2. Functional Prototype
A functional prototype is made from the actual production material and built to the final tolerances. It is designed to be tested under real working conditions: load, pressure, temperature, vibration, or wear.
This is the most important type of prototype for engineered parts. A CNC machined functional prototype tells you whether the part will actually work in service.
Best for: stress testing, performance validation, material verification.
3. Pre Production Prototype
A pre production prototype is the final step before full manufacturing. It uses the actual production process, the actual tooling (if applicable), and the actual materials. The goal is to confirm that the manufacturing process itself produces consistent, repeatable results.
For example, if the final parts will be laser cut and then welded into an assembly, the pre production prototype goes through that exact sequence.
Best for: process validation, confirming tooling, setting quality benchmarks for production.
How Prototype Testing Catches Design Flaws Early
Here are real examples of problems that prototype testing catches before they become expensive:
Fit and Assembly Issues
A bracket that looks perfect on a CAD screen may not fit the mating part in real life. Tolerances stack up. Holes may be slightly misaligned. Bends may have springback that the drawing did not account for. A single prototype reveals all of these issues in minutes.
Material Performance Problems
A part designed in mild steel may need to be upgraded to stainless steel after testing reveals corrosion in the operating environment. Discovering this at the prototype stage means changing a line on the drawing. Discovering it after 5,000 parts are galvanized and shipped means a full recall.
Machining and Manufacturing Challenges
Some designs are difficult or impossible to manufacture as drawn. A wall that is too thin for CNC turning will vibrate during machining and produce a poor surface finish. A prototype attempt reveals this immediately, and the engineer can adjust the wall thickness before production. When you only have a physical sample and no drawing, reverse engineering the part is often the fastest route to a testable prototype.
Weight and Balance
For rotating or moving components, the actual weight and balance of the finished part matter. A prototype on a balance or a test rig confirms that the part meets the dynamic requirements of the application.
Common Testing Methods for Manufactured Parts
The testing method depends on what the part does and what could go wrong.
| Testing Method | What It Checks | Applicable Standards |
|---|---|---|
| Dimensional inspection | All critical dimensions match the drawing | ISO 2768 general tolerances |
| Hardness testing | Material meets the specified hardness range | ASTM E18 Rockwell hardness |
| Tensile testing | Material strength and elongation | ASTM A370 mechanical testing |
| Pressure testing | Leak tightness under pressure | Application specific |
| Salt spray testing | Corrosion resistance of surface treatment | ASTM B117 salt spray test |
| Fit testing | Part assembles correctly with mating components | Visual and physical check |
At AMN Engineering, every prototype goes through a dimensional inspection report before it leaves the factory. Clients receive a full inspection report with measured values compared against the drawing.
Five Mistakes Buyers Make When They Skip Prototype Testing
Mistake 1: Assuming the CAD Model Is Enough
A 3D model is not a physical part. It does not account for manufacturing realities like tool deflection, weld distortion, heat treatment warping, or surface finish variations. Only a physical prototype reveals these.
Mistake 2: Ordering Full Production to Save Time
Buyers sometimes skip prototyping because they are in a rush. This often backfires. A production run with a design flaw takes longer to fix than a prototype cycle would have taken in the first place.
Mistake 3: Testing with the Wrong Material
Making a prototype in aluminum when the final part is EN24 steel gives misleading results. The part may pass fit and visual tests but fail under load because the material properties are completely different.
Mistake 4: Not Testing the Assembly
Testing individual parts in isolation is not enough. The prototype should be tested as part of the full assembly to check how all components fit and work together.
Mistake 5: Ignoring the Manufacturing Process
A hand finished prototype may look perfect, but can the part be produced consistently at volume? Pre production prototypes that use the actual manufacturing process answer this question. A clear request for quote that states the production process up front helps your supplier flag these risks early.
How AMN Engineering Handles Prototype to Production
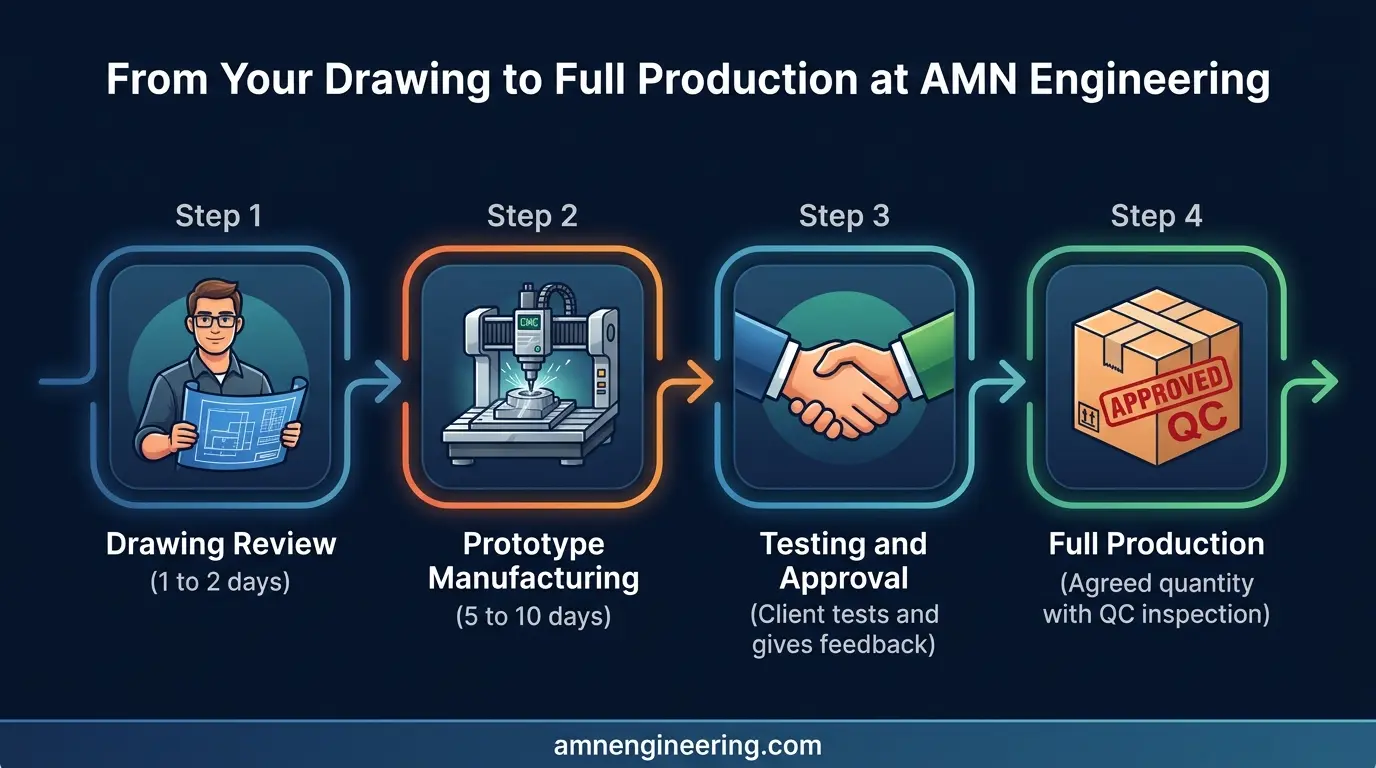
At AMN Engineering, our contract manufacturing workflow follows a clear four step process:
Step 1: Drawing Review
Our engineering team reviews the drawing, identifies potential manufacturing challenges, and suggests improvements before making the first cut.
Step 2: Prototype Manufacturing
We produce 1 to 5 prototypes using CNC machining, laser cutting, or fabrication depending on the part. There is no minimum order. We can make a single piece.
Step 3: Testing and Inspection
Every prototype is dimensionally inspected. We provide a full inspection report. If the client needs specific tests (hardness, pressure, surface roughness), we include those as well.
Step 4: Design Confirmation and Production
Once the client approves the prototype, we move to full production. The prototype becomes the quality benchmark. Every production part is compared against the approved prototype.
This process typically adds 7 to 14 days to the project timeline but can save weeks of rework and thousands of dollars in scrap. For a deeper look at the handoff from first article to volume, read our guide on scaling from prototype to production.
What a Prototype Costs vs What a Production Failure Costs
| Item | Prototype Route | No Prototype Route |
|---|---|---|
| Prototype cost | $150 to $500 | $0 |
| Production order (1,000 pcs) | $8,000 | $8,000 |
| Rework due to design flaw | $0 (caught in prototype) | $3,000 to $10,000 |
| Scrap from failed parts | $0 | $2,000 to $5,000 |
| Delayed delivery penalty | $0 | $1,000 to $5,000 |
| Total | $8,150 to $8,500 | $14,000 to $28,000 |
The prototype route costs less, delivers on time, and produces parts that work correctly the first time.
Frequently Asked Questions
Prototype testing catches design flaws, material issues, and assembly problems before you commit to large scale production. Fixing a problem at the prototype stage costs a fraction of what it costs after tooling is made and production has started.
Most projects need 2 to 5 prototypes depending on complexity. Simple parts may only need one round of testing. Complex assemblies with multiple components often need 3 or more rounds before the design is ready for full production.
A functional prototype is made from the actual production material and tested under real working conditions. A visual prototype shows the shape, size, and appearance of the part but may not use the final material or meet full tolerances.
A single CNC machined prototype typically takes 5 to 10 working days from drawing to finished part. Laser cut and fabricated prototypes may take 7 to 14 days depending on the number of components and welding required.
Yes. AMN Engineering has no minimum order quantity. We regularly produce single piece prototypes for testing and validation before clients move to full production batches.
